Shoulder Stretches Index
The following yoga shoulder stretches can be used to improve shoulder flexibility. However they do require a basic level of flexibility.
More shoulder stretching options
For more stretching options read Shoulder Stretches (for active shoulder stretching exercises) and Arm Stretches (for more relaxed shoulder and arm stretching options).
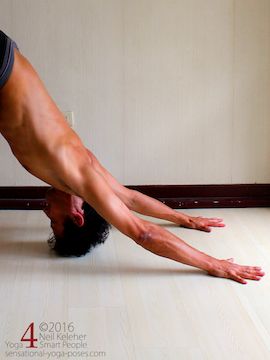
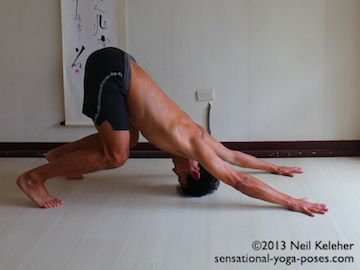
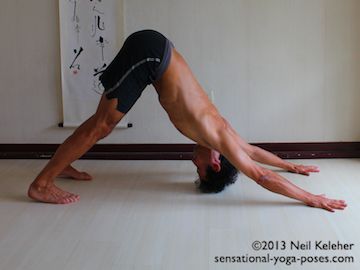
Downward facing dog can be turned into a shoulder stretch first pushing the ribcage and hips backwards and upwards, away from the hands. You'll be using your shoulders to do this. You may find it easier if you try this first with knees bent. Then work towards doing it with the knees straight.
Moving the ribcage back and up causes the head to move towards the shoulder blades.
Doing this same action while sitting or standing with an arm above the head, the shoulder blade would move towards the head.
Prior to moving your chest towards the floor, spread your shoulder blades to make your upper back feel wider.
Then work at spreading the bottom tips of the shoulder blades even more. From there work at reaching your upper chest down and back, towards your feet.
Keep pressing your ribcage back away from your hands as you do this.
Precautions and Substitutes for This Yoga Shoulder Stretch
Pay attention to the way that you position and stabilize the shoulder blades relative to the ribcage.
If you find that you are experiencing shoulder pain during or after this version of downward dog then you may be better of leaving this particular yoga shoulder stretch out.
You can substitute spiderman wall stretch or puppy dog chest stretch instead.
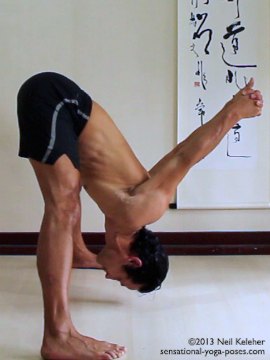
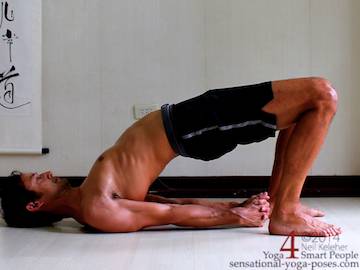
The arm position used in prasarita padottanasana C can also be used in plow pose and in bridge yoga pose.
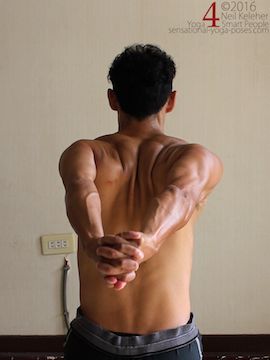
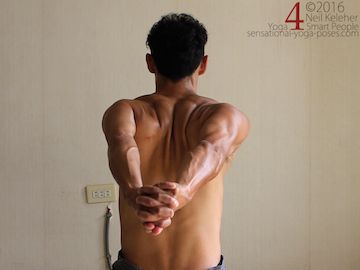
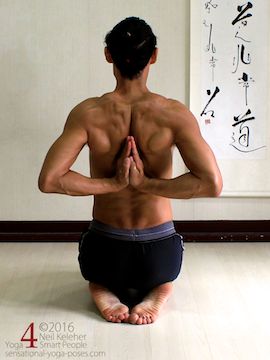
In an upright position (sitting or standing) this yoga shoulder stretch involves clasping the hands behind the back, straightening the elbows and then lifting the arms.
- If you can't clasp your hands behind your back then hold on to a towel or belt and gradually work your hands closer to each other.
The general action steps I take towards this pose are to
- draw the shoulder blades together, then
- straighten the elbows (this can be down one arm at a time) and then
- lift the arms.
Make Your Arms Feel Long
Prior to lifting the arms try to make your arms feel long.
- Initially reach your arms down your back.
- As you lift your arms reach your hands away
from your back.
Work at keeping your neck long as you lift your hands higher. Work at keeping the palms together.
If you have good shoulder blade awareness, lead the action by pulling your accromion processes forwards and down, as if trying to pull the top of your shoulder blades down the front of your ribcage.
An additional action that may make it easier to lift the hands higher is to rotate the upper arms inwards slightly so that the backs of the upper arms move outwards, away from each other.
To make working towards this arm position easier use this pec minor activation exercise below (internally rotate your arms).
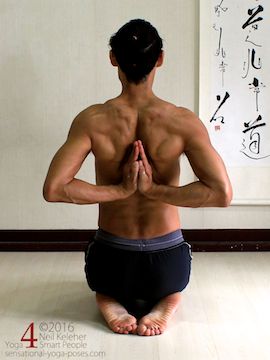
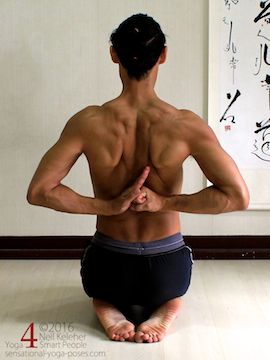
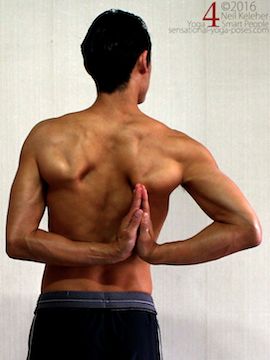
When I first started practicing yoga I found it crucial to prepare for reverse prayer shoulder stretch by first doing the prasaritta padottanasana C arm position. With practice I can go straight into reverse prayer shoulder stretch without the prep.
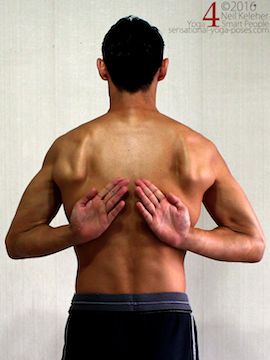
This arm position can be used to help stretch your chest and the fronts of the shoulders. It's also stretches the fronts (palm side) of the wrists.
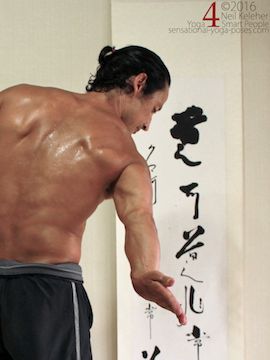
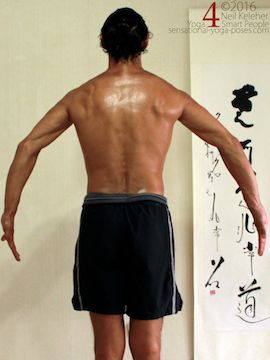
The first part of getting your arms into position behind your back is rolling the arms inwards while reaching them back (and out) at the same time.
You could think of this as "internally rotating" the arms.
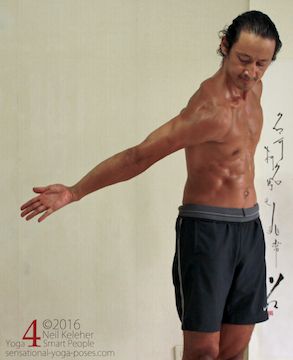
If you have trouble doing this with both arms at the same time, then practice first with one arm at a time as shown below.
When you internally rotate the arm at the shoulder, the front of the arms roll inwards. This means that the back of the arms roll outwards, away from the spine.
This helps to give you room so that you can bring your hands together behind your back.
You may find that if you rotate your arms inwards enough, then when you bend your elbows your forearms move behind your back. In this case, with arms rolled inwards, your forearms will be pointing slightly backwards.
I'd suggest that if you can't get your hands behind your back, then practice internally rotating your arms. Rather than holding the internal rotation you practice rotating and then releasing in time with your breath. Focus on feeling your arms and shoulders as you practice and see if you can notice where the tight spots are. Again you may also benefit by working with one arm at a time. Do not be afraid to bend your ribcage forwards as you rotate your arms inwards.
Hand Options for Reverse Prayer Shoulder Stretch
Even if you can internally rotate your arms you may still have difficulty getting your palms together in reverse prayer.
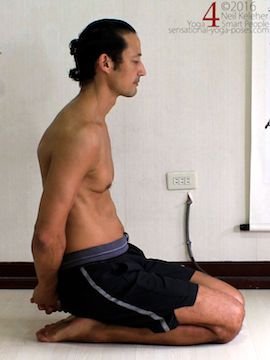
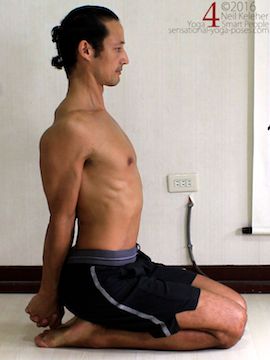
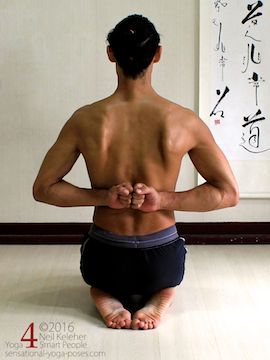
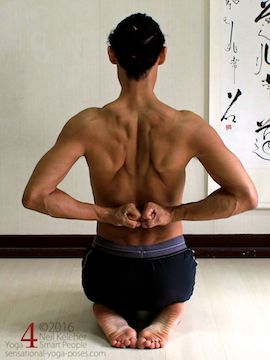
An option, shown below is to make both hands into fists.
When doing the double fist option, you can first have the back of the hands against your back.
Then flip your fists so that the bottom of each fist faces downwards (bottom left two pictures).
Then with both hands in fists progress to one hand open (bottom right). Note that with this option, with just the right hand fisted you could try starting with both hands to the right. Then gradually move your hands to the center of your back.
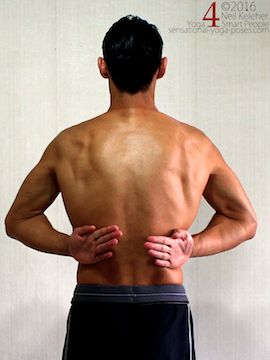
One you are able to do reverse prayer comfortably, another option for increasing shoulder and wrist flexibility is to move both hands to the side with palms together.
Move both hands to the right so that your hands are to the right side of your ribcage, but behind your back (shown below). Then try the same thing to the left.
Opening Your Chest and Shoulders
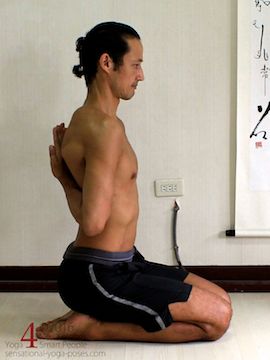
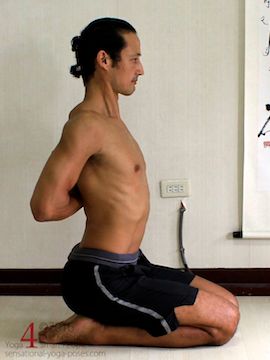
Once you can get your hands together behind your back in reverse prayer you can practice moving your shoulders and elbows back.
You can do this using any of the above hand positions. I'd suggest that again you practice doing this in sync with your breath.
As you inhale open your chest (bend you thoracic spine backwards) and at the same time move your elbows back to open the front of your shoulders. Then as you exhale relax your chest and let your elbows move forwards (first two pictures below).
As you get used to this yoga shoulder stretch you can keep your chest open and your elbows back. You can also work at sliding your hands higher up your back (last picture below.)
Reverse prayer can be a good way to stretch the shoulders and chest in preparation for Wheel pose.
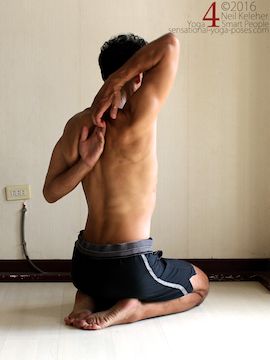
In cow face yoga shoulder stretch one arm reaches up and the the other arm reaches down.
Both elbows are bent and the hands are (ideally) clasped behind the back.
The down arm seems to be the most problematic.
Starting with right arm uppermost, you can reach your right arm up over your head. Focus on lifting the shoulder. Move it upwards. Keep the shoulder lifted and bend the elbow reaching the hand down behind the back.
You can then use your free hand to pull the elbow inwards and backwards. You may find it helpful to draw the bottom tip of the shoulder blade outwards.
For the downward arm start with the arm by your side and internally rotate it, as you would do for reverse prayer shoulder stretch.
Try to draw the shoulder blade inwards, towards the spine.
Reach the arm back while keepng the shoulder blade retracted and the arm internally rotated.
Then bend the elbow and reach the hand up the back.
Ideally you can reach your lower hand high enough that you can connect both hands behind your back. If not then try grabbing a towel or strap or belt between both hands.
Stretching One Arm at a time In Cow Face Yoga Shoulder Stretch
For a two part yoga shoulder stretch first focus on using the top arm to pull upwards on the bottom arm. Then focus on using the bottom arm to pull downwards on the top arm. You can try this whether the hands are clasped or you are holding on to a towel or belt.
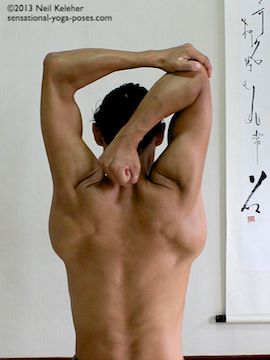
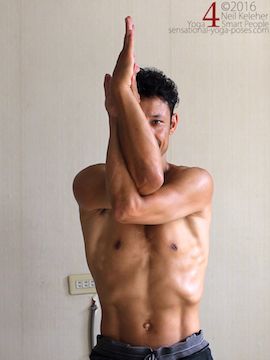
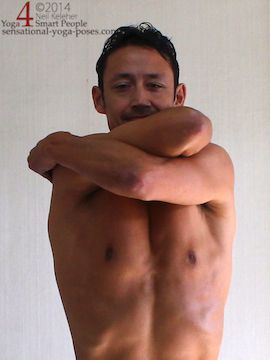
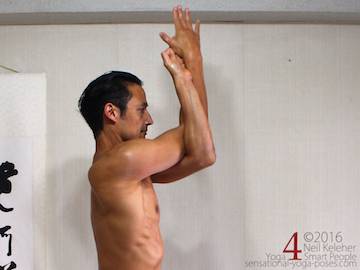
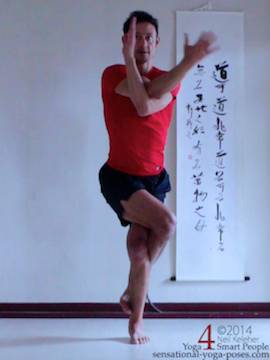
One approach for the eagle yoga shoulder stretch is to cross the arms in front of you with elbows bent. Then grab the back of the opposite shoulder with both hands.
You can then use your hands to pull your elbows past each other. You can hold this shoulder stretch for a few breaths.
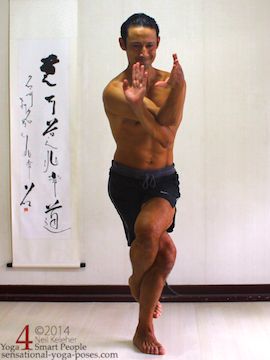
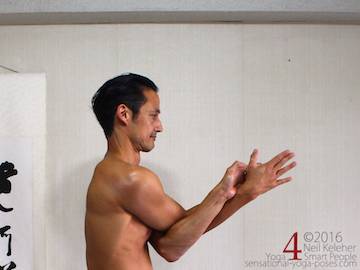
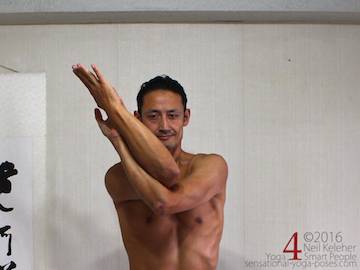
Keep your upper arms crossed but release your grip on your shoulders. Spread your shoulder blades. To move further towards eagle arms shoulder stretch, rotate your upper arms outwards (biceps out, triceps in) so that your forearms cross.
Once your forearms cross you can then hook the fingers of your lower arm into the palm of your upper arm.
Once your arms are in eagle pose you can vary the shoulder stretch by
- reaching your forearms forwards (below left) or
- lifting your elbows (below center).
- You can also tilt your arms to upper arm side to give the upper arm an external rotation stretch (below right).
Depending on how you position your shoulders you can also tilt your arms to the lower arm side. (You might find it helpful to bend your spine to the lower arm side also when doing this.)
Another Option for Getting the Arms into Eagle Pose
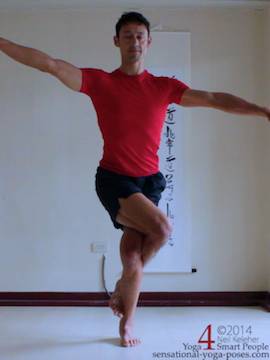
Another option for getting the arms into eagle pose arms is to reach both arms out to the sides with the arm that is going to be on top slightly higher.
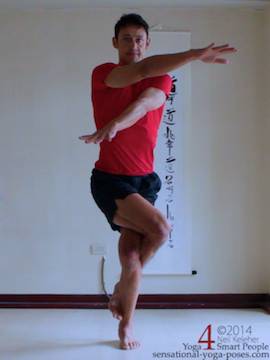
Keeping your elbows straight, cross your arms in front of your body. As your arms cross, bend your elbows and externally rotate both upper arms to move your forearms past each other. You can then place the fingers of your lower arm to the inside of the wrist of your upper arm. If at first you don't succeed you can repeat this exercise slowly and smoothly with your breath. Inhale arms apart, exhale and cross the arms and externally rotate.
Once you can bind your arms in eagle pose you can practice the arm position with the leg position from eagle pose.
Or you can use this arm position with other standing or seated yoga leg positions.
For more shoulder strengthening, stretching and awareness exercises, check out the Yoga for Your Shoulders ebook.
Published: 2014 05 22
Updated: 2021 03 10
