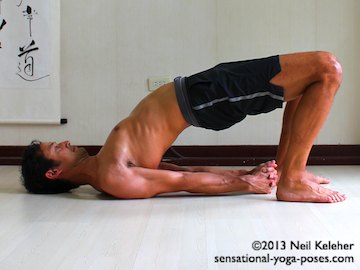
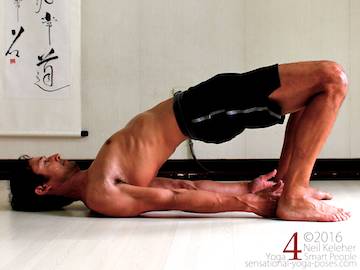
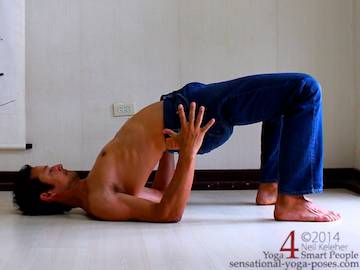
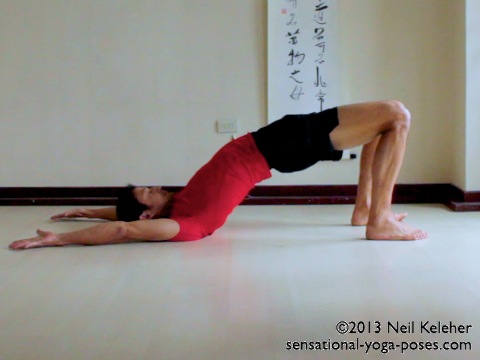
Bridge Yoga Pose
Choosing to Backbend at the Hips, Lumbar Spine and/or Thoracic Spine
On page cat links
Back bending
In both Bridge Yoga Pose and Wheel Pose there are a minimum of four points of contact with the floor.
- The feet and legs are used to push the pelvis up towards the ceiling and
- either the shoulders and head (in the case of bridge) or the hands (in the case of wheel pose) are also on the floor supporting the upper body.
Generally both of these poses are thought of as back bends, or more specifically, backward bending poses.
What part of the body is bending backwards? And where should you focus the backbend?
Ideally, the decision on where you choose to focus the backward bend (whether on the hips or the spine or a bit of both) should be made on what makes the pose easier and deeper without excessively stressing any part of the body.
That then makes the pose not only easier but more comfortable.
Defining Backward Bending and Forward Bending
How do I define what is a back bend and what is a forward bend?
More importantly, what is a backbend for the hips and what is a back bend for the spine?
When I was teaching bridge (and the actions that follow) I had to clarify what I meant by backward bending and forward bending.
In general a forward bend involves bending a part of the body around something in front of the body.
- A forward bend for the spine involves bending the spine around something in front of the chest or belly.
- A forward bend for the hips means bending the hips around something in front of the hips.
- A backward bending action is the opposite.
- As for a bend to the left, that means bending a part of the body around something that is to the left of the body.
- Bending to the right is the opposite.
Seated Backbending Exercise
The following exercise is going to be used as a prep both for bridge yoga pose and wheel pose and any other exercise where you want to bend the spine backwards.
And it'll also get used to feeling the difference between bending the spine backwards and forwards. And we'll learn how to use the sacrum as a landmark or reference for backbending and forward bending the spine and hips.
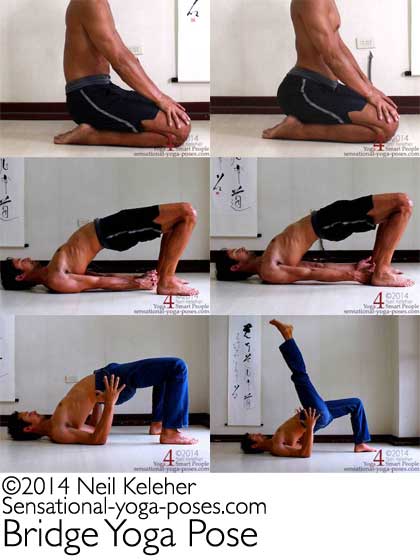
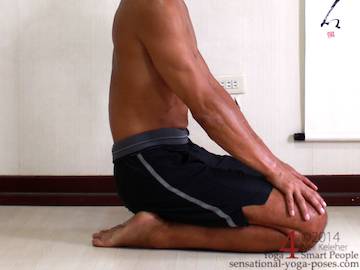
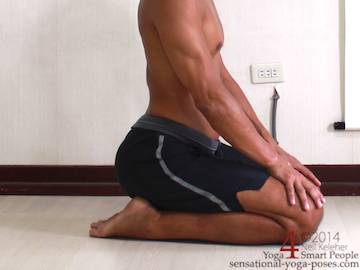
For this bridge/wheel pose preparation sit in a kneeling position.
Focus on your sacrum. Lift your sacrum so that your pelvis rolls forwards.
Then let it lower and repeat.
Do both actions smoothly and slowly, like a deep slow breath. And stay focused on feeling your sacrum as it lifts and lowers.
Continue the movement then focus on feeling your lumbar spine.
As you lift your sacrum feel your lumbar spine bending backwards.
You may notice tension along either side of the lumbar spine as your spinal erectors activate.
To increase the back bend try increasing the tension gradually.
Then release the tension as you lower your sacrum and curve the spine forwards.
Repeat this a few times then expand your awareness to include your thoracic spine.
Continue the same slow and smooth movements but now as you lift your sacrum allow your lumbar spine to bend backwards from the bottom upwards, and carry the backbend up into the thoracic spine.
Extend the lines of tension on either side of the spine up from the lumbar spine up into the thoracic spine. Then relax as you bend forwards.
To make bending the thoracic spine easier try lifting the back ribs as you bend backwards. The lifting action comes from creating a squeeze just to the outside of the lines of tension along either side of the spine.
Next focus on feeling your chest.
As you bend your spine backwards feel your chest lifting and expanding, feel the spaces between the ribs opening up.
Relax as you bend the spine forwards.
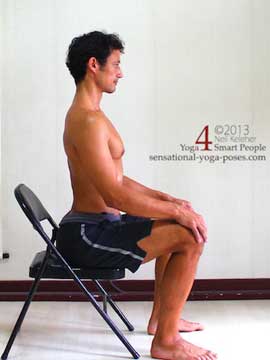
This exercise can also be practiced while sitting in a chair.
Noticing the Hips
While I went into feeling the lumbar spine, thoracic spine and chest, the starting focal point was the sacrum. When you lifted the sacrum the spine bent backwards. But what then happened to the hips?
Because the pelvis was tilting forwards relative to the thigh the hip was actually bending forwards. Lower or dropping the sacrum the pelvis tilts back relative to the thigh creating a back bend in the hip.
Learning the Options
So now a question could be, while moving up into bridge yoga pose, should we be focusing the backbend on the hips or spine?
Having done the above exercise we now have a tool with which to explore bridge yoga pose (and perhaps afterwards wheel pose) to see for ourselves.
Rather than saying that we should focus more on the hips or more on the spine, I'm going to suggest that on any given day your body will be different and what is more important than knowing how to do a pose is knowing the options for exploring a pose so that on any given day you can find the best way to do that pose that suits the way your body is on that day.
Our bodies are constantly changing and so what works one day may not work the next. But it may work at some point in time. And perhaps what is more important is the idea of being able to explore your body so that on any given day you can figure out the actions that will work the best for you on that day.
The more you practice at this "experimenting" or playing, the easier doing yoga gets.
Moving Up Into Bridge Yoga Pose
So moving up into bridge yoga pose, start on your back with your knees bent and your feet close enough to your buttocks that you can touch them with your finger tips.
Position your feet so that they are roughly parallel.
Use your legs, press your feet into the floor to slowly lift your pelvis up. Rather than pushing up as quickly as possible, see if you can gradually push higher so that you have time to feel your body as you move your pelvis higher.
Can you feel your heels and forefeet pressing down with equal pressure? If not modulate.
Actively press the fronts of your feet down so that they press with down with the same pressure as your heels.
As you press higher up into bridge yoga pose what are you doing with your chest and shoulders?
Gradually press your shoulders down into the floor, or squeeze the shoulders together. Then bend the thoracic spine backwards to increase the lifting and opening of your chest.
As for your head, you could press it down a little to add tension to the back of your neck.
Or you could try pulling up on your head so that you add tension to the front of your neck. You can then use this tension to help lift and open your chest even more.
Shifting the Backbend from Hips To Spine (and Back Again)
Now focus on the pelvis, hips, and lower back.
Focusing on your sacrum, slowly and gradually move your sacrum forwards. As you do so notice the way this action opens the fronts of your hips as your pelvis tilts backwards.
Next to the opposite.
Slowly pull your sacrum backwards. See if you notice an increase in backward bending of your lumbar spine.
If you find that your knees went forwards, or more importantly, if you knees feel a little sore, pull them back, towards you head.
You'll be moving your pelvis backwards as you do so and that will cause your spine to bend backwards some more.
Now move the sacrum forwards again.
You may find that you can shuffle your shoulders slightly closer to your feet. Then move your sacrum back, moving your knees back again as you do so.
Repeat a few more times and you may find that as you do so you can gradually deepen the backward bend of both your hips and spine while in bridge yoga pose.
Afterwards you could simply focus on holding the pose.
Find a middle ground between moving the sacrum forwards and backwards. Ideally, what you'll then have found is a position where the hips and spine share the back bend.
From there you can play with different arm positions in bridge yoga pose.
Bridge Yoga Pose Arm and Leg Options
You can interlace the fingers and squeeze the shoulder blades together, or try to pull the arms apart while keeping the palms together. You can separate the hands and push them outwards against the inside edges of the feet or ankles.
You can bend the elbows and actively press the elbows down into the floor.
Or with the arms straight and reaching towards the feet press the whole of the back of each arm and shoulder into the floor. In this position you can reach and lengthen the arms backwards, moving the shoulders towards the ears, or you can focus on pulling the inside edges of the shoulder blades away from the head while reaching the outer edges of the shoulder blades towards the head at the same time pressing the arms down and the upper portion of the shoulder blades down.
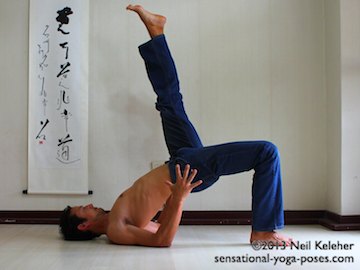
You can also play with lifting one leg.
In this case, to lift the leg higher and to pull it back more, in the direction of the head, you may find then that it helps to move the sacrum forwards, reducing the backbend of the hips so that the lifted leg then has more room to bend forwards at the hip.
Press the supporting foot down into the floor to lift the pelvis higher (and keep it lifted). Press the elbows and shoulders down also (if doing the bent elbow version as in the picture above.) And reach with the lifted leg.
You May be Interested in...
For another look at bridge pose, particularly with regards to clenching or not clenching the buttocks read this article on bridge pose.
For more on backbending, in particular wheel pose, and other strength poses like chaturanga and downward dog you may be interested in Working Towards Wheel Pose. The exercises in this book are designed to make wheel pose easier to work towards, even for beginners.
Published: 2011 10 02
Updated: 2023 03 24
