Stretching for beginners TOC
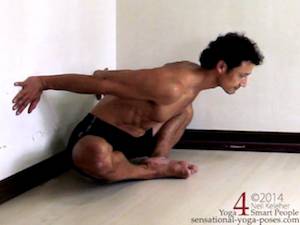
Bound angle
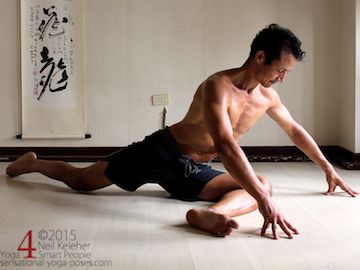
Pigeon Pose Hip Stretch
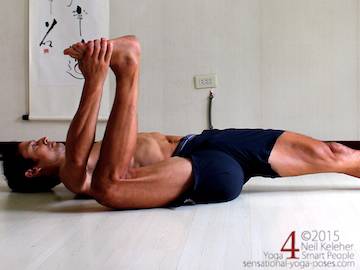
Happy Baby Hip Stretch
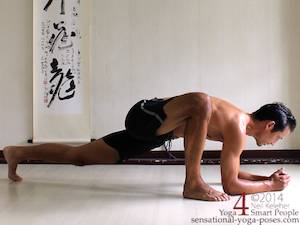
Low Lunge Hip Stretch (lizard)
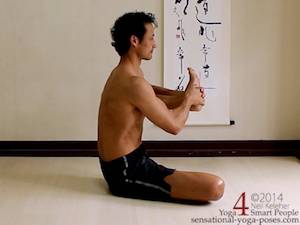
Upright Happy Baby hip stretch
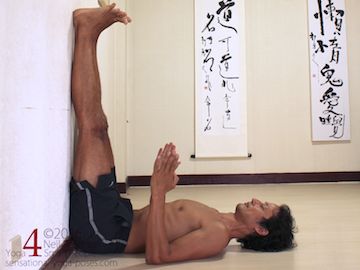
Supported Hamstring Stretch
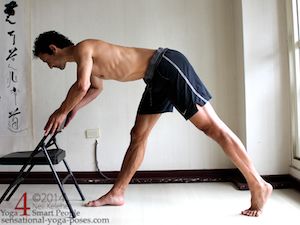
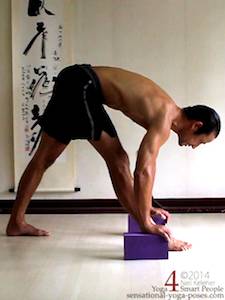
Pyramid pose hamstring stretch
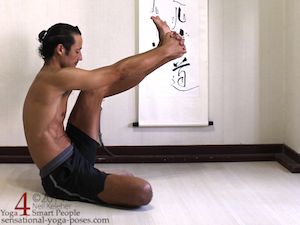
Seated Hamstring Stretch
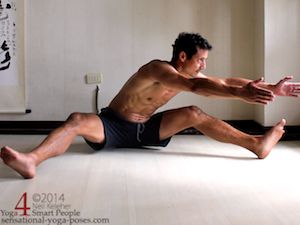
Seated wide leg hamstring stretch
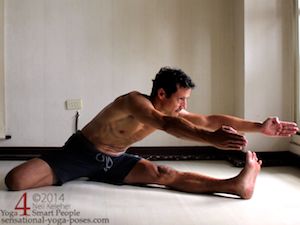
Hurdler's stretch
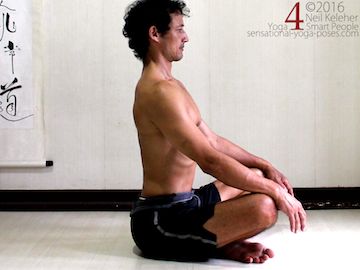
Spinal Back bend
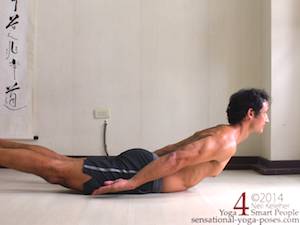
Locust Pose
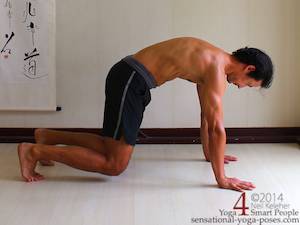
Dog Pose Knee lift
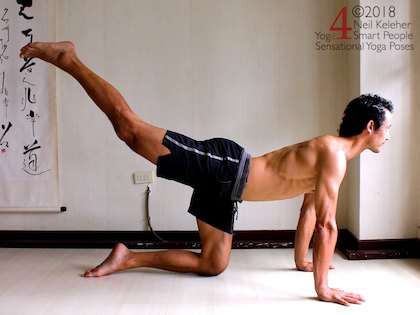
Leg Lift
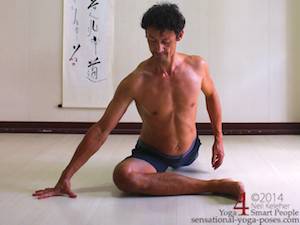
Pigeon Pose with hip lifted
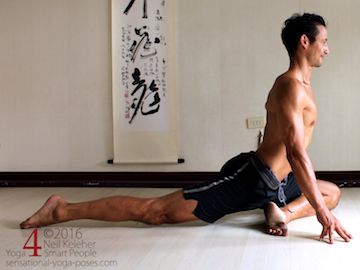
Pigeon pose with hip lifted
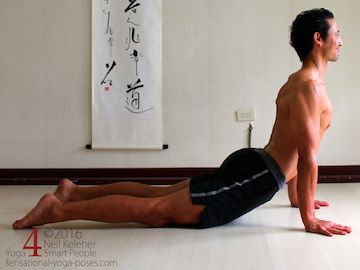
Upward dog
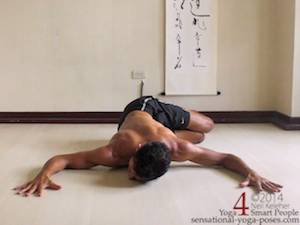
Prone spinal twist
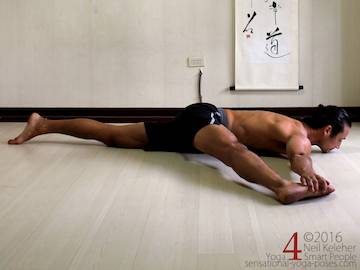
Easy adductor stretch
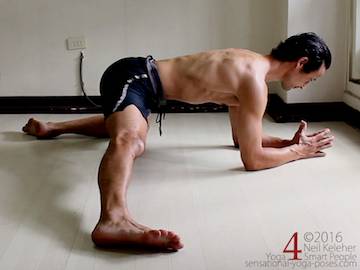
Half split
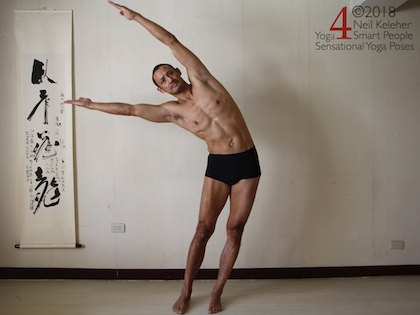
Standing side bend
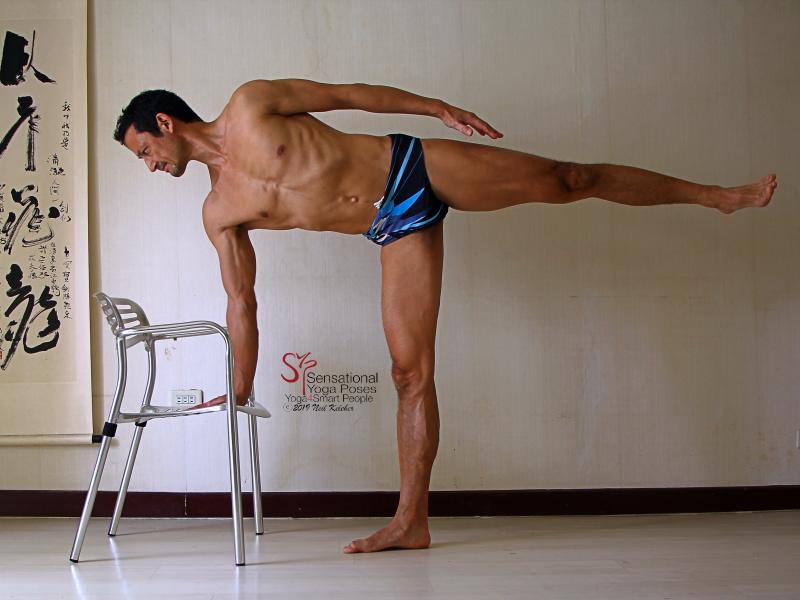
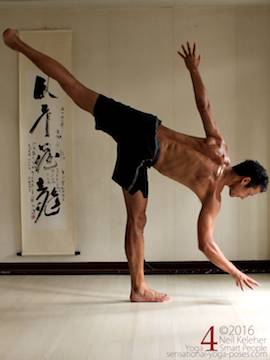
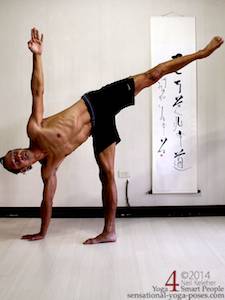
Half moon pose
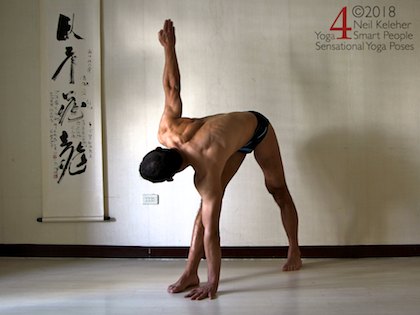
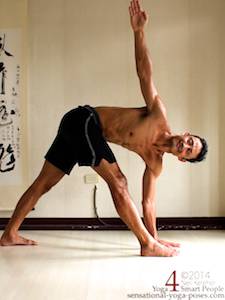
Twisting triangle pose
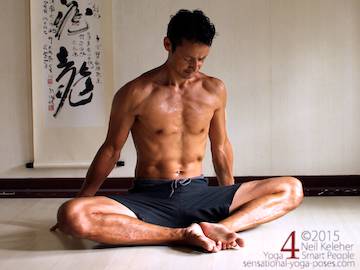
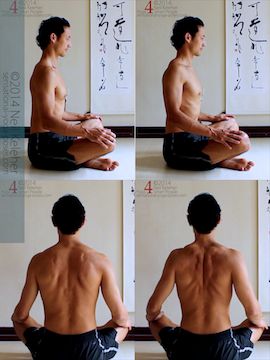
The first stretch is bound angle (otherwise known as baddha konasana.)
I see a lot of people at the gym who can't even sit upright in this pose and in a lot of cases their knees are near their chest.
Their inner thighs are that inflexible.
I used to be that way too. This pose still isn't one of my easiest, particularly when bending forwards, but here are a few of the tips for making it easier to work towards a straight back while sitting in this pose and some times for getting the knees closer to the floor.
If Your Back Rounds
(And if your Inner Thighs are Reallllly Tight)
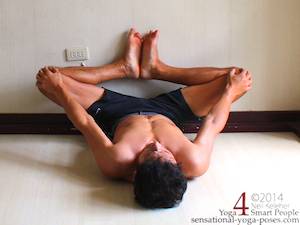
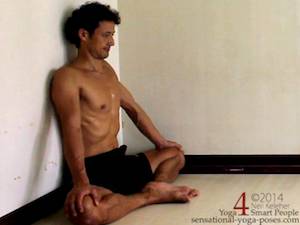
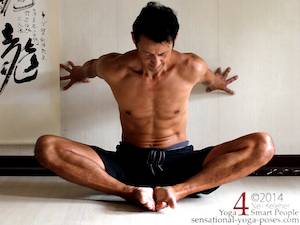
If you can't sit upright and simple solution is to do this pose against the wall.
You can lay down with your feet against the wall or you can sit upright with your back against the wall. In either case you can use your arms to stretch your inner thighs.
The trick is to resist with the inner thighs.
I'd suggest gradually activate inner thighs to work against the arms and then gradually relax both.
Also experiment with making the arms stronger than the legs so that the knees gradually sink down with the inner thighs resisting all the way.
Another option with your back against the wall is to focus on pressing the sides of the feet down into the floor without using the hands.
Rather than pressing the knees down focus on pressing the feet down since this activates the musculature at the side of the butt as well as the sides of the shin. It creates tension along the entire length of the outer leg (including the outside of the knee.)
Keep Your Feet Active
An important tip is to spread the inside edges of the feet, like opening a book.
Try to use the musculature of the feet and ankles to do this as opposed to the hands. It can feel like pulling the ball of the big toe out and down (towards the floor.)
The Next Step
Away from the Wall
As your knees start to get closer to the floor (over a few weeks or months) try the same position away from the wall.
For this option place hands on the floor behind you. Focus on pressing the sides of the feet into the floor and again spread the inner edges of the feet.
To keep the chest lifted and "open" press your hands into the floor and move your shoulders back (so that your shoulder blades retract.)
How to Make Bending Forwards Easier
In Bound Angle Pose
To work on the forward bend go back to the wall and place your hands against the wall with elbows bent initially.
Move your butt closer to the wall or further away to suit.
Then while pressing the feet down, push your hands against the wall so that your torso and pelvis both tilt forwards.
Open the chest either before or after pressing the hands into the wall.
Make your neck feel long by drawing your ears away from your shoulders.
More Forward Bending Options for
Bound Angle Pose
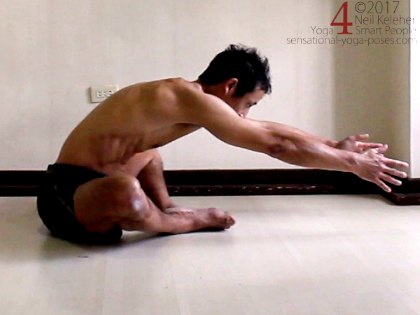
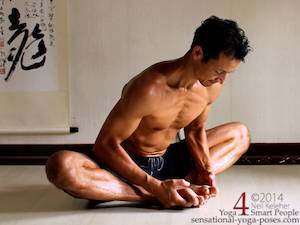
The next option is to grab onto the feet or reach the arms forwards.
I actually prefer the arm reaching option though it's harder to get leverage. If you have something to hold on to in front of your body so that you can pull your self forwards do continue to press the feet into the floor.
When grabbing the feet also keep the feet strong.
Press the feet down and pull the arms up and keep the chest open.
You may find that at a certain point you'll have to start playing with muscle tension close to the hip joint in order to get deeper but for now the above tips should help.
Stretching the Outer Hips with "wide" bound angle
One final note, you can use bound angle to stretch both the inner thighs and the outer thighs.
To stretch the outer thighs do the pose with feet further forwards.
With the feet about 12 inches or less (30 cm) away from the pelvis you'll find that it works the inner thighs.
Try varying the distance to find for yourself the point at which the pose changes from an inner thigh stretch to an outer thigh stretch.
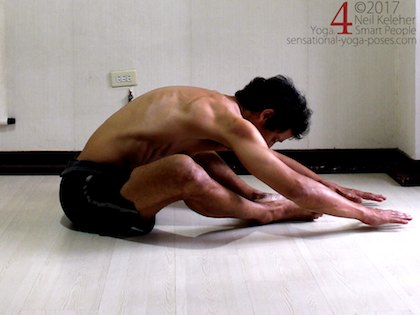
I often start a stretching practice for beginners with the wide version of this pose (with the feet further forwards), then repeat the pose with feet closer to the pelvis.
You may find that with the feet far enough forwards its a lot easier to bend forwards.
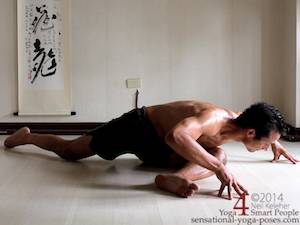
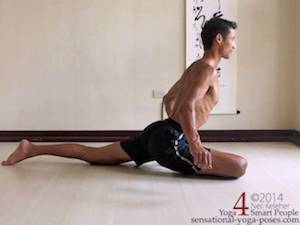
After bound angle pose a stretch that is easy to move into from there is screaming pigeon.
If in the recommended position (shin parallel to front of mat) the knee hurts try moving the foot back to see if that makes the knee more comfortable. You could also experiment with moving the foot forwards.
From bound angle simply swing one leg back behind you. Rest the front leg hip on the floor and move the front foot forwards so that the shin is parallel to the front of your yoga mat.
Generally it should be pretty easy to move your front foot further forwards or back by simply leaning away from the foot.
If your right foot is forwards then lean to the right. Then move your right foot forwards or back as required.
Reach the back leg back as far as possible and try to point the knee down as much as you can.
Position the rear leg so that it is parallel to the side of your mat.
With the front leg hip on the floor chances are that your back leg hip will be lifted. That's fine. In this stretch one of the goals can be to let the back leg hip sink down without lifting the front leg hip.
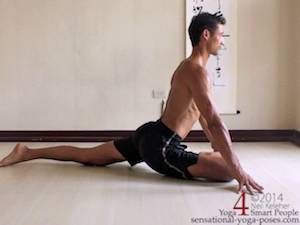
The general stretch is to sink your chest downwards so that it rests on your front knee.
To get there you can first rest on your elbows then to sink deeper move your elbows out to the side. Or as shown you can use your arms to slowly lower your ribcage towards the floor (like doing a push up).
Making screaming pigeon stretch more Comfortable
And Effective
The trick to make this pose more comfortable and more effective is to press the knee down.
This should cause the muscles at the side of the butt to activate and possibly also the side of the thigh.
Try pressing your knee down and then relaxing and repeating. You can add on to this action by gradually drawing your ribs forwards (away from your pelvis) as you press the knee down.
To add some weight to the stretch lift your back knee. You don't have to straighten it, just lift it so that the weight of the leg helps to sink the back leg side of the pelvis.
Intensifying the Stretch
To intensify the stretch reach the ribcage towards the front foot.
With your right foot forwards you'll be reaching your ribcage to the left. Use the right arm to help push (or prop) your ribcage.
Though it may take a while you can work at getting your right shoulder to your right foot. (Work first at getting the sternum to the foot. You could also try getting your right ear or cheek to the base of your foot.)
When reaching your ribcage to the side you may find it helps to push down with the front foot instead of the knee.
Options for Intensifying
One way to get the shoulder towards the foot is to first sink the chest down and then use the outside arm to push the ribcage towards the foot.
Bend the elbow and move the hand close to the knee. Then keeping the hand in place straighten the elbow to push the ribcage to the side.
You can deepen the stretch by moving the hand inwards. You can reduce the stretch by moving the hand outwards.
Another option is to start with the ribcage lifted and the arm straight.
Keep the arm straight and use it as a pivot as you sink the ribcage.
Gradually Intensifying
Generally for beginners I prefer to have them moving within the stretch, especially the first few times. The action can be as simple as:
- Reaching the shoulder towards the foot and then
- Relaxing by moving back in the opposite direction.
Repeat both actions slowly and smoothly and see if you can gradually go deeper.
As you get more sensitive you may be able to feel your way into the pose.
This can happen by varying the downward pressure of the knee and/or foot, by reaching one side or the other side of the ribcage away from the pelvis, and even by adjusting the way that you are using your breathing muscles.
Hip extensor stretches are like hamstring stretching yoga poses except that they don't stretch the hamstrings.
They stretch the back of the hip while the knee is bent. (Hamstring stretches stretch the back of the thigh and the back of the hip with the knee straight.) I tend to use hip extensor stretches prior to hamstring stretches.
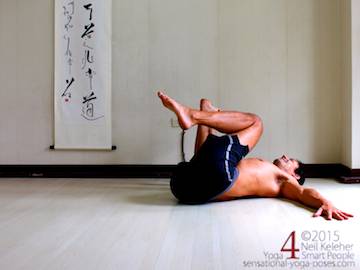
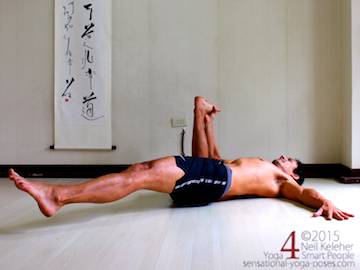
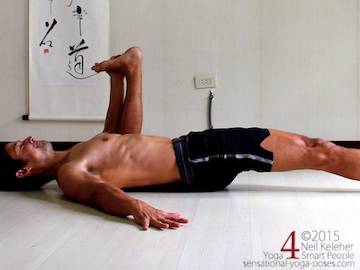
The first hip extensor stretch is a variation of happy baby pose.
- From screaming pigeon swing the back leg forwards (so that both legs are forwards) and then lay on your back.
- Bend both knees and grab the outside of one foot with the same side hand.
- Keep the knee bent and the shin vertical, pull the knee to the floor to the side of the ribcage.
You can resist by pushing the foot up against the hand but make the arm strong so that the knee slowly moves down. For now it's alright if the hip on the opposite side lifts up.
- To help that hip sink down slowly reach the free leg forwards.
To release you may find it helps to bend the other knee and bring the knee to the chest first, then release. Repeat on the other side.
One idea to get from this pose is that the knee moves past the ribcage (towards the back of the body).
The only thing that stops it in this pose is that the floor gets in the way.
You can increase the stretch a little by lifting the ribcage and head (using the abs) or you can turn the pose around.
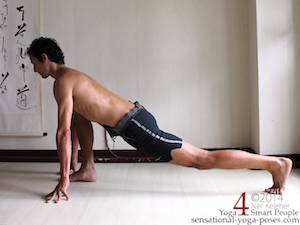
That leads us to the low lunge.
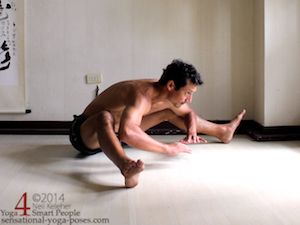
If possible roll up to a squat and from there reach one leg back.
- Place the back knee on the floor (or keep it lifted as in the pictures).
- Move the front foot far enough forwards so that the front of the ankle is just behind (about an inch) the front of the knee.
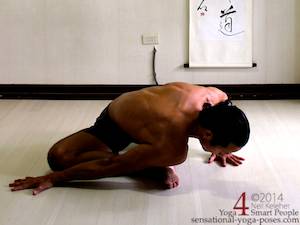
- If your right foot is forwards place the left elbow on the floor first. Then sink the right elbow down.
- Position the right arm so that the upper arm is in front of the shin.
Try to keep the knee close to the chest and to sink your chest deeper, move the elbows to the side.
To make it easier to stretch try pressing the front foot down then releasing. Not sure what that means?
Try relaxing the arms and then lifting them. Even if you can't that's fine. Notice the effort that your front leg has to exert to even get close to being able to lift the hands.
Now do the same action without lifting the arms. Make the leg strong then relax. Repeat, making the activation and relaxation slow and smooth.
Each time you relax let your pelvis and ribcage sink deeper.
To make it easier to sink the chest deeper come up onto your hands and then bend the elbows as if lowering into a push up.
Here again activate the front leg then relax it. Each time you relax the front leg, use your arms to let your ribcage sink down closer to the earth.
Add Weight
To add weight to the stretch (so that it is easier for your pelvis to sink down) lift the back knee.
If you have difficulty holding the pose with the back knee lifted, practice lifting the knee and then lowering it slowly and smoothly. Relax when the knee is on the floor.
To make that action more mindful focus on pressing the back foot down into the floor in order to lift the knee. See if you can pressurize the back foot just enough to make the back knee feel "light" on the floor. Then gradually increase foot pressure to lift the knee higher.
Try to lower (and then relax) the knee with the same mindfulness.
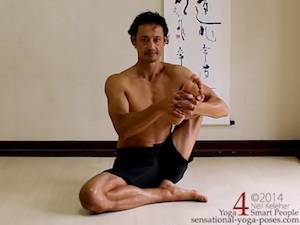
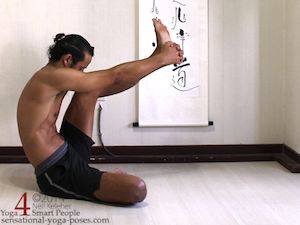
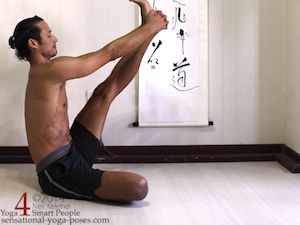
One other option hip extensor stretch option is to do happy baby while sitting upright.
Work at pulling the knee back past the back of the ribcage.
Hamstring Stretches for Beginners
The next set of stretches for beginners is hamstring stretches.
For someone with really limited flexibility a simple option is to lay on your back with your feet against the wall.
You can start of with your butt a little bit away from the wall and then gradually move your butt closer to the wall.
Another option is to bend the knees a little then slowly straighten them, then relax and let them bend again. Repeat both actions slowly and smoothly and focus on lengthening the back of your neck and lumbar spine at the same time.
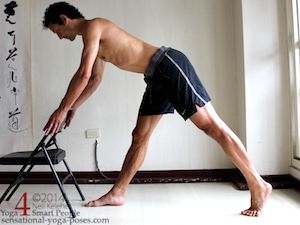
The next option is a standing forward bend. Again, if you are really limited it will help to use a chair as a prop.
Stand with one leg forwards and the other back. The back heel can be lifted though I rarely use this option.
The usual option that I use is to turn the back foot out so that the back heel is on the ground.
In either case, if you can't touch your hands to the floor easily, then use blocks or a chair (or table or counter top).
The idea is that you can use your arms to support the weight of your upper body so that your hamstrings can relax.
To help the hamstrings relax (and so that you can learn to feel when they are relaxed):
- First make your leg strong so that you can lift your hands.
- Then put your hands down, make the arms strong and relax the leg.
Repeat slowly and smoothly.
Actually, rather than just doing the movement slowly and smoothly, see if you can activate and then relax your leg muscles slowly and smoothly also.
You may find that with practice each time you relax you can sink down a little bit lower.
(For more details on this check out my ebook Yoga Hamstring Basics.)
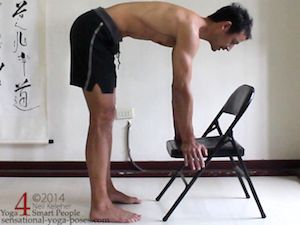
With both feet about hip width apart (and even) you can bend forwards and again use your arms to support the weight of your body. Then see if you can relax your arms without letting your chest sink down. You should feel your legs activate in order to support your body. Keep the arms active so that your legs can relax and then slowly and gradually bend the elbows while working to keep the hamstrings relaxed.
For seated hamstring stretches one option is to grab on to one foot and straighten the knee.
(This can follow on from the upright hip flexor stretch in the last section.)
Easier said than done.
If you can't straighten the knee then use a strap.
Wrap it around the bottom of the foot and hold on with both hands. Whether or not you are using a strap, start with the knee bent. Lengthen your spine, straighten the leg, then pull the leg back a little, then relax and repeat.
Here again slow and smooth is the key. If you can't pull the leg back don't worry.
Focus on lengthening leg and spine (and then relaxing.)
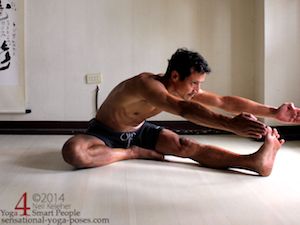
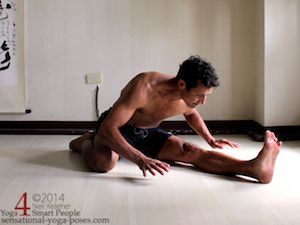
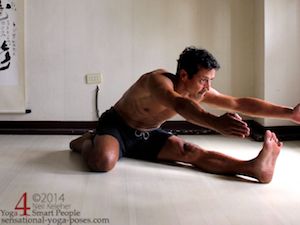
The next option is a selection of seated forward bending hamstring stretches.
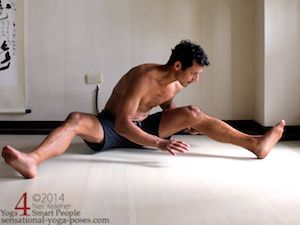
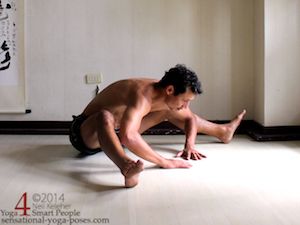
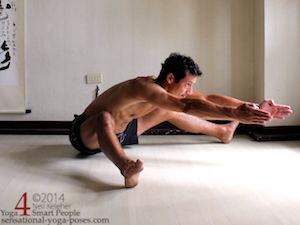
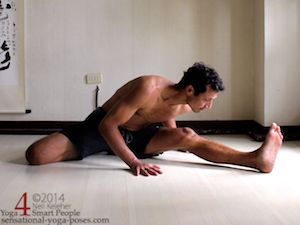
Starting with the legs wide, bend forwards towards one leg.
If you can't bend forwards then bend the knees.
Use the arms to support the weight of the upper body so that the leg can relax!
- Press the leg down (press the heel down if the knee is bent) so that the leg feels strong and the arms relax.
- Slowly open your chest (reach sternum away from pubic bone),
- lift your hands and reach them forwards so that your leg muscles work harder.
- Then put your hands back on the floor, reactivate the arms and relax the leg.
- Let your chest sink down.
Repeat slowly and smoothly.
If you find it too difficult to lift the hands (or reach them forwards) then leave them on the floor and focus simply focus on pressing the foot/leg down and then relaxing it.
Open the chest as you make the leg strong.
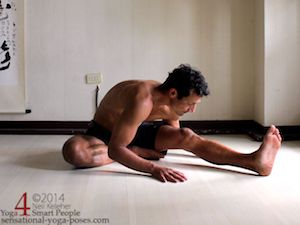
After doing the other side try the same action but while bending forwards between the legs.
Even though I am pretty flexible, I still sometimes start with knees bent, and then gradually straighten them as I repeat the actions in this pose.
Notice how straight my spine is (or how "uncurved" it is.) With arms lifted make spine and arms maximally long.
Try reaching forwards with your eyes also.
Other options for seated hamstring stretches include bending one knee and placing the foot in the hurdlers position.
Another is to place the foot against the inner thigh.
Yet another is to fold the shin to the outside of the thigh but make the thighs parallel (knees hip width apart.)
For this variation, you can press down with the straight leg so that the bent knee hip sinks down.
This then stretches the quadriceps.
Hip Flexor Stretches and Stretching the Front of the Spine For Beginners
In the last two sections the focus was on stretching the hamstrings and (before that) the hip extensors. Both of these could be considered forward bends for the hips.
This next section of stretches for beginners focuses on backbends for the hips (or hip flexor stretches) as well as the spine.
Where forward bends tend to be more relaxing in nature, backbends tend to require more work and tend to energize (the opposite of relax.) And so you might be advised to be cautious when doing back bends before going to bed.
You may find difficulty sleeping straight after doing backbending type yoga poses.
That being said, if you move into backbends slowly and smoothly and stay calm, (and don't do too much) you may find that you can still sleep even after doing backbends.
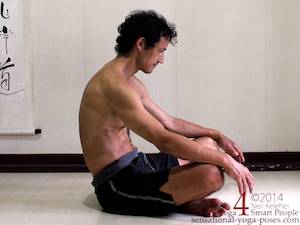
The most simplest backbend (or one of the simplest back bends is a seated spinal backbend.
I often teach this at the beginning of classes to get my students used to feeling their tailbone, lumbar spine and thoracic spine, and to get them used to bending the spine backwards (and then forwards).
When bending your spine backwards, ideally what you'll learn to feel are your spinal erectors activating.
These are the muscles that run up along either side of the spine.
- Starting from the bottom by lifting your tailbone so that your pelvis tilts forwards. (Do this while sitting on the floor kneeling or cross legged, or on a chair, or while standing with knees slightly bent.)
- At the same time notice and feel your lumbar spine bending backwards. Looking for a feeling of contraction on either side of the lumbar spine.
So that the contraction is easier to learn to feel, release the action and then and repeat it, slowly and smoothly. Focus on feeling on your lower back until you can feel the activation and relaxation of your spinal erectors.
- Once you can feel your lumbar spinal erectors activating then carry the contraction up the thoracic spine so that your ribcage bends backwards also. Your chest/front ribs will lift and open as a result.
Note that the more you contract or "squeeze" the spinal erectors, the more you'll bend your spine backwards.
Keep looking straight ahead (as opposed to looking up) so that your focus is on bending your lumbar and thoracic spine backwards.
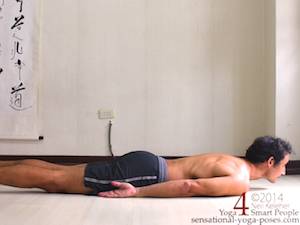
Lay on your belly for the next set of backbending stretches for beginners.
- Lift your chin an inch off of the floor and pull your ears away from your shoulders so that your neck feels long.
- Next, bend your thoracic spine backwards, working from top to bottom so that your chest slowly peels off of the floor.
- Hold for a few breaths, then release.
- Repeat after a brief rest but this time, after bending the thoracic spine backwards lift the tailbone and bend your lumbar spine backwards so that your lumbar and thoracic spinal erectors are active.
- Lift arms and legs and reach them back. Focus on making spine, legs and arms feel long.
Hold for a few breaths and memorize the feeling of having the spinal erectors active. Release and rest.
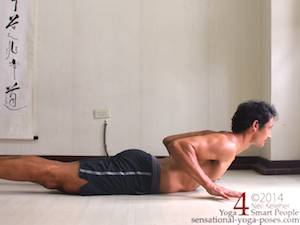
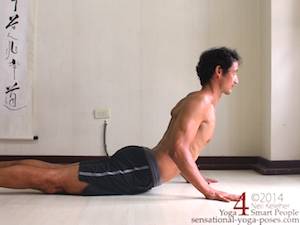
Next, bend the elbows and position the hands beside the ribcage.
- Repeat the exercise as before but lift the hands an inch off of the floor.
- Rest and then repeat but this time keep the hands and legs on the floor. Use the strength of the arms to lift the ribcage a little higher. Keep the spinal erectors active.
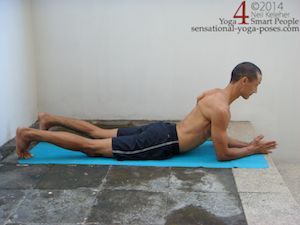
An alternative that isn't quite so hard on the arms is to prop yourself up on your elbows.
- Spread your shoulder blades and press your elbows into the floor.
- Use the spinal erectors to bend the spine backwards (and keep it bent backwards) and use the arms to lift the chest and at the same time pull it forwards. (Feel like you are using your elbows to push back on the floor.)
Keep your neck long.
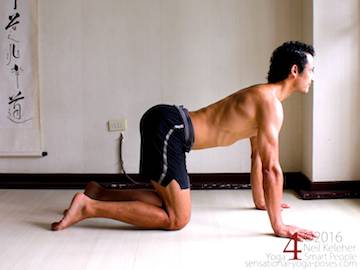
For a counterpose, or simple to rest the back of the body, lift up into cat pose, spread the shoulder blades, then press the feet down and lift the knees an inch or less off of the floor.
Hold for a few breaths then slowly touch your knees to the floor and then slowly relax the legs.
Cat Pose and Extended Cat Pose for stretching the front of the spine and hip
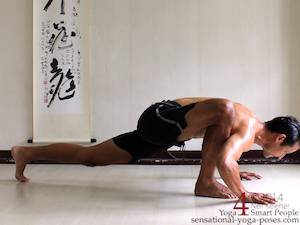
Next, activate the spinal erectors while in cat pose position.
While on all fours, lift the tailbone, and bend your lumbar and thoracic spine backwards.
Rather than allowing yourself to sag into the backbend consciously activate your spinal erectors.
Keep them active while reaching one leg back.
Lift your leg as high as possible.
Keep the pelvis level from left to right and keep the knee pointing downwards.
You'll feel the butt and hamstrings (of the lifted leg) activate.
Pause for a moment, then return to the starting position and relax your spinal erectors. Then repeat on the other side.
Repeat both sides two or three times, alternating sides each time.
(If you need to stretch out your back, (and/or relax your spinal erectors) do the dog pose knee lift again.
Bonus: Shoulder Blade Protraction
As an added exercise for shoulder awareness, in cat pose practice spreading the shoulder blades so that your ribcage moves up, then retract your shoulder blades so that your ribcage moves down.
Repeat a few times then when moving into the extended leg cat pose, work at keeping your shoulder blades protracted (spread apart) so that your ribcage stays lifted (and bent backwards.)
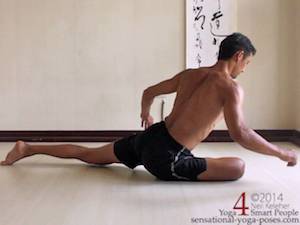
For the next stretch, bring one leg forwards and swing the other leg back as you did in screaming pigeon.
Make the leg set up exactly the same keeping the front leg hip on the floor and positioning the front shin parallel to the front of your mat and the back leg parallel to the long edge of your mat. Use your arms to lift your ribcage.
Because only one hip is on the floor you'll be leaning to one side.
- First, Use your spinal erectors to bend your spine backwards.
- Next, use the arm on the front leg side to lift the chest higher (if right leg is forwards use the right arm).
- Then use the same arm to gradually push the ribcage to the away. If right leg is forwards push ribcage to the left so that the left hip moves closer to the ground and the ribcage approaches vertical. Keep the right hip on the floor.
- Press the back foot into the floor and lift the knee. Try to squeeze the buttock and hamstring of the rear leg. Try to duplicate the feeling that you had when lifting the leg in extended cat pose.
- You can also focus on reaching the rear foot further backwards.
To recover, kneel or sit cross legged and bend your spine forwards.
In this version of upright pigeon the front leg hip is lifted. The front foot can be further back in this pose (so that the shin is not parallel to the front of the mat, but rather, the foot is even with the opposite hip, or perhaps a little bit forwards or back.)
Start with the front hip leg hip and both hands on the floor. Press the knee down to lift the hip then lower it again.
Repeat a few times using the hands to help then try it with your hands lifted.
Once you are comfortable with the action keep the hip lifted and exert just enough pressure with the knee so that the pelvis is level from left to right. Put your hands on the floor and use them to lift your ribcage higher.
As with the other version of this pose:
- activate the spinal erectors,
- lift the back knee,
- activate the glutes and hamstrings of the back leg and
- reach the back foot rearwards.
This next stretch might not be suitable for beginners.
If you aren't sure, move into it slowly and smoothly and focus on activating your spinal erectors. Then as in pigeon, lift the knees and squeeze the back of both thighs and both buttocks. With the muscles at the back of the legs and the back of the spine active, your pelvis should push forwards and down.
Next use your shoulders to pull your chest forwards and upwards. (It may feel like you are pulling the floor back with your hands.)
To make it easier to open your chest and lift it focus on drawing your lower belly inwards each time you inhale. As you pull your lower belly in gradually expand and lift your ribcage. (You can use this technique in both version of the Upright Pigeon Hip Flexor stretch also.
Twists, and More Outer and Inner Thigh Stretching for Beginners
For the next series of stretches for beginners we'll start of with a spinal twist.
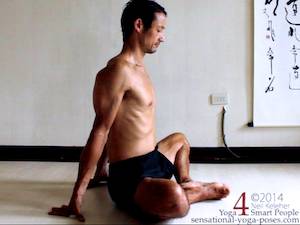
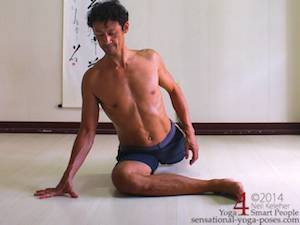
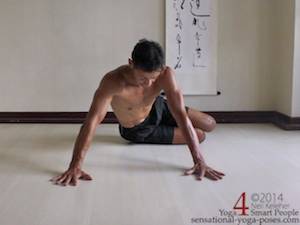
One of my favorite spinal twists is a prone twist. If from upward dog or cobra you move into a kneeling position.
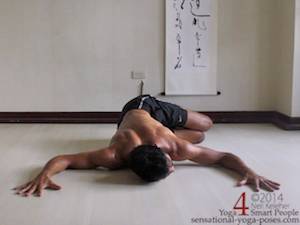
Then slide or lift your hips to the right of your feet. Then move your knees to the left so that your thighs are parallel to the front of your mat with your shins 90 degrees to the thighs. Use your arms to lower your chest forwards down to the floor.
For now keep the head face down or turned in the same direction as the knees.
If possible position both elbows on the floor with the upper arms straight out to the side and the forearms forwards.
With the knees to the left work at turning your ribcage to the right. Focus on dropping the left side of the ribcage and on lifting the right side of your ribcage. If you are deep enough into the twist and you feel comfortable doing so, then turn your head to the right also.
Focus on drawing one side of the ribs away from the pelvis and then the other side.
Then focus on opening one side of the ribcage (focus on opening the spaces between the ribs) and then the other side.
Additionally, press the side of the bottom thigh into the floor.
The next pose is a preparation for stretching the inner thighs.
The pose is normally done standing, or laying down, then the belly is uppermost. In this version, the belly is down.
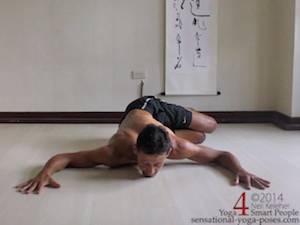
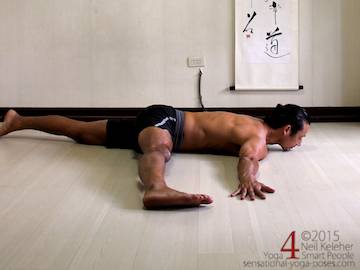
So after doing both sides of the prone twist, (above) reach both legs back so that you are laying on your belly with your knees pointing down. Next, use your right arm to lift the right side of your body (roll it off of the floor) then swing or move your right leg to the right.
Put the foot on the floor with the knee pointing straight ahead.
Keep the other leg reaching back. I like to reach both arms out to the sides. If you can reach the foot, then grab it.
You can relax in this stretch and focus on letting the left hip sink down, or you can activate the inner thigh muscles of the leg being stretched and then relax.
Actually for this action I'd suggest first gradually pulling in the low belly, then expand the ribcage (causing an inhale) and then activate the inner thigh of the outstretched leg. Relax all actions for an exhale.
Repeat both sides and then get ready for half side splits.
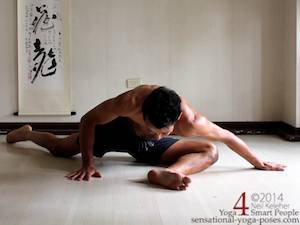
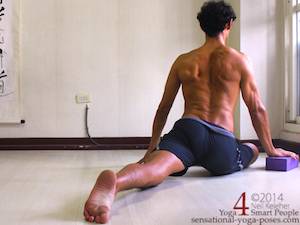
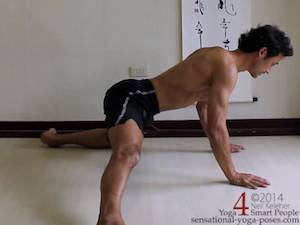
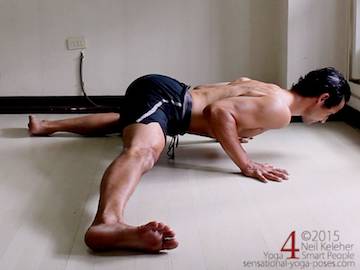
From a cat pose like position move one leg to the side with the knee straight. Slide the foot away from the bent knee. Position the foot, knee and pelvis so that when viewed from the side they are in the same vertical plane.
As you get low, place your elbows on the floor.
If you get even lower, use a push up position for the arms and lower your chest on the floor.
In both cases:
- gradually draw in low belly and expand ribcage and activate inner thighs for an inhale.
- Relax both for an exhale.
- Additionally, if your chest and hands are on the floor, use the arms to lift the chest a little while inhaling, then put it down again while exhaling.
(An alternative leg activation is to activate the quads and hamstrings as well as the inner thighs.)
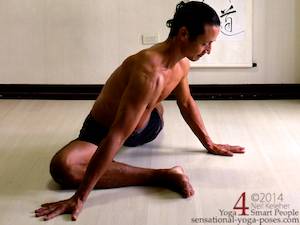
In between sides I like to sit in a kneeling position.
You can use this position to practice pulling in your lower belly and expanding your ribcage to inhale.
Additionally, you could also practice some shoulder awareness.
With the chest lifted move the shoulders back (retract the shoulder blades) then relax and repeat.
Next, after retracting the shoulder blades pull the elbows back, then relax and repeat. Next, after pulling the elbows back straighten the elbows so that the forearms move back. Relax and repeat a few times. Try to make all movements slow and make the movements smooth. (The mosaic below shows only shoulder blade retraction.)
After doing half splits on both sides (I often repeat each side twice, alternating sides or doing the same side twice in a row) move on to the next pose.
The next pose is a standing side bend.
Standing with feet hip width and parallel with knees straight, push the hips to the right. To accentuate this action use the left foot to push the floor to the left.
Bend the lumbar spine and the thoracic spine to the left.
Practice breathing with the arms down first of all.
Then reach the arms past the head.
First pull in your lower belly, then expand your ribcage and as your ribcage expands reach through your arms so that your arms feel long. As you exhale smoothly relax all of these actions.
Additionally, press down through the fronts of the feet.
Squeeze the backs of the thighs.
For half moon pose turn the right foot out 90 degrees. Lift your left leg.
Tip down to the right and touch your right hand to the floor. (Use yoga blocks or stand close to a wall and place your hand on the wall if you can't reach the floor.)
Again practice breathing. You can pull your lower belly in, inflate the ribcage and then try to lift the hand. When relaxing put the hand back on the floor.
An alternative is to try looking up while maintaining balance.
For this pose stand with one leg forwards and the other foot back. Both knees are straight.
Bend forwards and place both hands on the floor either side of your front foot.
If you can't reach the floor use yoga blocks to "raise the floor."
Try pressing your front foot into the floor each time you inhale.
Next if you right foot is forwards lift your right hand. Turn your ribcage to the right. Here again, each inhale press the front of the front foot into the floor. Prior to this pull the lower belly in and work at moving your ribs away from your pelvis.
Some final thoughts on stretching
Kit Laughin says it best (and simply too.) "One of the best reasons to stretch is that it feels good."
And it's probably why my students keep coming back to my yoga stretch classes.
Sometimes the good feeling comes during the stretch, sometimes after.
Some stretches don't feel good during or after. That's the type of stretching that I try to avoid.
Actually, I don't necessarily avoid it, instead I've spend the last 5 years looking for ways to make stretching in general feel more good. That has meant changing what I do within a stretch.
As I grow to understand the body I've realized that what I am doing is helping the body work more effectively within a stretch. And why is that more effective? Because it turns off the safety mechanism in the body that stops you from being flexible in the first place.
It's kind of like putting a baby in a crib so it doesn't keep rolling off the edge of the bed. Once a parent sees that the baby has some control (or has gotten to big for the crib) then it's time for a bed. In my case we never had a crib, instead I had to teach my daughter how to stop herself from falling.
And that's what stretch training is, it's teaching the body how to handle bigger ranges of flexibility without injuring itself.
When the brain knows how to operate the body in bigger ranges of motion then it eases off on the protective mechanisms.
It's like takin the training wheels off of a bicycle wheel. When you know how to ride, you don't need them.
Published: 2014 11 08
Updated: 2020 10 19


